How to replace the lower front wishbone bushings – Pajero NM/NP
I found out that there is a worn bushing in the lower front control arm of my Pajero NM.
The symptoms were “knocks” and play on the front wheels, especially while braking in low speed.
I replaced the old bushings with a new set of “SuperPro” bushings (click the link to buy them on eBay).
Please notice, You MUST do a wheel alignment after that procedure!
The required tools:
1. Flat screwdriver
2. 10,12,17,19,21,22 mm wrenches.
3. 32mm socket + long wrench
4. Pliers
5. Hammer
6. Spring Compressors
7. Jack stands
Step by Step guide:
1. Release the wheel nuts a little and raise the car, lower it safely on the jack-stands.
2. Remove the wheel and put it under the car, I put it under the engine, so if something will go wrong and the car fall of the jack stands, it will be stopped on the wheel and not on me…
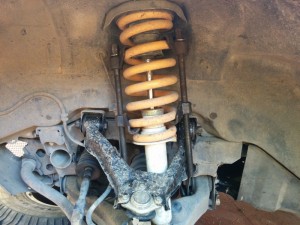
3. Locate the spring compressors in place and compress the springs a little.
4. Now we have to remove the front axle shaft.
a. Using a flat screwdriver and a hammer remove the cap of the wheel (you can’t see it in the picture below, it has already removed…)
b. Carefully remove the split pin of the center of the axle shaft .
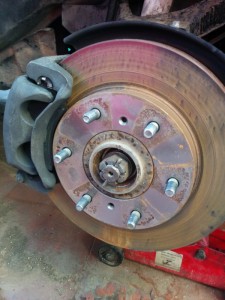
c. Use the 32 mm socket to open the front axle nut, use a flat screwdriver to avoid the brake disc from spinning (see the picture below):
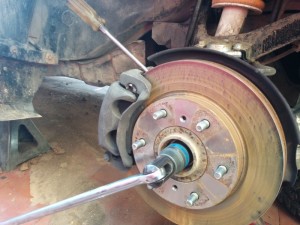
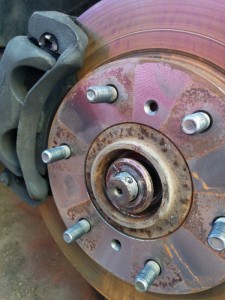
5. Now, remove the caliper and disc, DO NOT disconnect the brake hose. See “Replacing front brakes” article for details. Make sure that the caliper is not hanging on its hose.
6. Release the lower shock absorber nut (22mm) and bolt.
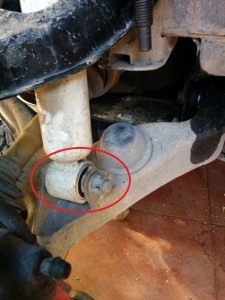
7. Using a ball joint remover, remove the steering ball joint and the sway bar bolt.
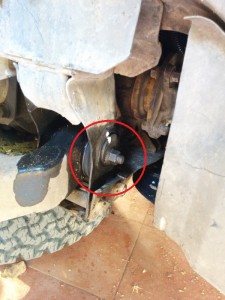
Few words about how to remove the sway bar bolt, it is a 17mm or 19mm nut. In the ball joint, there is a 6mm Allen “hole” so you can hold the bolt from spinning with the Allen wrench and remove the nut with a 17/19 mm ring wrench.
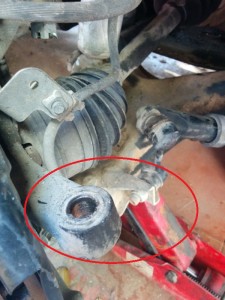
8. Release the upper control arm ball joint by removing the 3 bolts (usually, 12 or 10 mm bolts, depends on the ball joint manufacture).
Release the 3 bolts that hold the lower ball joint in place.
<img class="alignnone size-medium wp-image-594" src="http://www.pajero.guru/wp-content/uploads/2014/10/upper-ball-joint-225×300.jpg" alt="upper-ball-joint" width="225" height="300" srcset="http://www.pajero.guru/wp-content/uploads/2014/10/upper-ball-joint-225×300.jpg 225w, http://www.pajero atorvastatin 80 mg.guru/wp-content/uploads/2014/10/upper-ball-joint.jpg 600w” sizes=”(max-width: 225px) 100vw, 225px” />
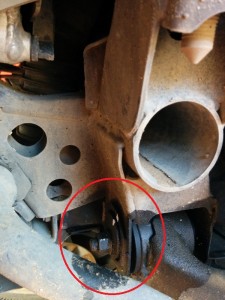
9. Now we have to remove the control arm itself. The bolts that holds it in place are eccentric bolts. Mark the current place of their plates and try to install them in the same location +-.
You MUST do a wheel alignment after that procedure!
Use a wrench to release and remove the nuts, notice that sometimes the bolts are stuck due to rust and dirt. Try to spay anti-rust spray and use a hammer to release them, in the worst case, you will have to cut the bolts and install new ones, make sure that you have where to buy those unique bolts…
10. Pull the lower control arm carefully…
11. Removing the old bushings: I used a torch 02 burner to burn the rubber and then cut the metal sleeve out of the control arm.
12. Install the new bushings and install everything in the reverse order.
Now, it is time to wheel alignment!



Hi Saar,
So you have removed the axle or just loosened the nut? Is it possible to remove the arm without disassembly of the axle?
Also, what’s a brenner?
Thank you.
The best and fastest way would be removing the axle from the hub (no need to remove it from the diff side). I spend almost a day in the first time when I didn’t remove the axle, the other side took me less than 2 hours since I learned my lesson and removed it…
Regarding the brenner it was a spelling mistake which I didn’t notice 🙂 – it is a burner – o2 torch burner (gas cutting/welding tool)
Thank you,
Saar
Hi 🙂
Great post!
One question: to install the new bushings, do you need a hydraulic press?
I have read somewhere that is pretty tight and you would need a press.
I have also read somewhere that there are some bushings that come “cut in half”, so you don’t need pressure to install them inside the joint, is this true?
Thanks!
Hi,
That is true.
If you are using Powerflex (for example) are cut in half and you can install them with your hands.
The original type of bushings should be installed with a press.
Great. Thanks 🙂
In the post you say you used a torch to burn the old bushing. You used a torch instead of some sawing method (a Dremel, i.e) because you have to keep the metal casing (a metal tube inside the bushing) right?
I used a torch since it was the easiest way 🙂
If you are going to install powerflex bushings, yes, you will have to keep the inner sleeve (the metal casing).
If you are going to install a standard bushing (as the original) you will have to remove the metal case as well.